We are big fans of the Divi Theme from Elegant Themes and use it almost exclusively on our projects. As they released the much anticipated v4.x of Divi, we made plans to evaluate and then slowly and safely update the sites we designed with Divi.
Most of the issues were minor and there were easy workarounds. But we ran into a big problem when we took advantage of one of the new features. Their Theme Builder feature enables the ability to do amazing things with the header, footer and other parts of a site. It was tested on a couple of sites with no issues and then we created a new header for our Graphics Unleashed site and had some big problems.
Almost every type of content in WordPress is a post since the platform was originally built for blogging. Things built with Theme Builder are a custom post type. Unfortunately this caused issues with a couple of tools we were using on the site as they were set to display below posts.
The first conflict was with Easy Social Share Buttons for WordPress. It has a variety of functions, but we used one of them to display social sharing buttons below each blog post. Unfortunately they were now displaying below the header instead. The only immediate solution was to turn off the social sharing buttons.
As Elegant Themes, makers of Divi, also make the Monarch plug-in. Monarch also has social sharing buttons and we felt that Elegant Themes would have made sure their products worked well together. Unfortunately the same problem existed when Monarch was activted. So the best solution for now was to go without social sharing buttons. Yes, we could have probably found a workaround, but it was time to move on.
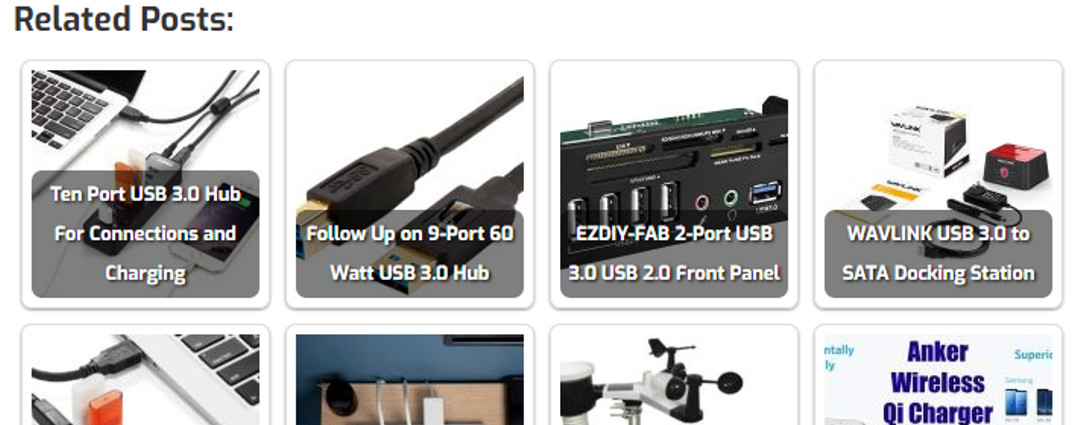
We also had a problem with related posts. On this site we were using the related posts functionality provided by the Jetpack plugin. Just like the social sharing buttons, the related posts were displaying under the header. After exploring alternatives, we discovered the Contextual Related Posts plugin was a solution though we needed to tweak the settings.
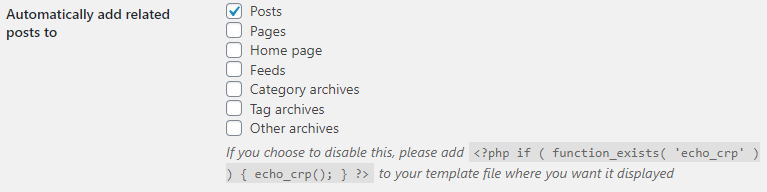
First, we turned them on in the General tab of the settings. This did not solve the problem as related posts were still displaying below the header.
To solve the problem, we went to the List Tuning tab and checked Limit to same post type as shown below.
Now the Related Posts were only displaying below the blog posts as desired. While we were unable to solve both issues, solving one was better than nothing.
Of course these issues were reported to the support team at Elegant Themes. They acknowledged it was a bug and that it would be addressed in an update in the near future.
Building a good looking Web site that delivers useful information to visitors is very important. Once built, it is important that the site have solid Search Engine Optimization (SEO) so that it ranks well in the search engines and gets seen by more people. In the first part of this series, we have a set of tutorials explaining different types of SEO.
In the early days of Web design we had GIF and JPEG. Then PNG came along in the mid 90s to provide a very good alternative to GIF. Other formats have come and gone since then with none of them truly taking hold. That is, until now! The folks at Google have created the WebP format and it is one you should consider using. Let’s look at why it is beneficial and then how to use it on your WordPress site.
There are two major types of images: lossless and lossy. WebP has answers for both and those answers provide smaller files than the alternatives. Smaller files mean Web pages load faster and that’s always a good thing.
We now use JPEG format for lossy images. Lossy images have different sizes based on how much quality you are willing to sacrifice. When using an equivalent quality, WebP images are 25-35% smaller than JPEG.
PNG is typically used for lossless images and has the benefit of an alpha channel. What’s an alpha channel? It allows for varying levels of transparency. WebP can do lossless and an alpha channel while being 26% smaller than PNG.
If any of you want all the technical details, Google has the info for you. While Google provides a tool for converting images to WebP, it may not be the best choice right now for Web designers. WebP is directly supported in Chrome and Opera, but not other browsers. So if you use it directly, your pages will probably not display correctly in other browsers.
How Do I Use WebP With WordPress?
If you try to directly upload a WebP image into WordPress today, you’ll likely get a message that the file type isn’t allowed for security reasons. Given the limited browser support, that’s isn’t such a bad thing. The best way to use WebP with WordPress is via a plugin. While there are several choices, the best free option is the EWWW Image Optimizer. The plugin has a number of other features, but we’re focused on the WebP support.
Using the EWWWW Image Optimizer Plugin, you’ll still upload JPG and PNG files just as you’ve always done. The plugin converts those to WebP format and serves them up to site visitors using a supported browser. JPG images will become lossy WebP images and PNG images will become lossless WebP images (with alpha channel intact). It is also compatible with caching and content delivery networks. This option is as simple as installing the plugin and enabling the WebP feature.
Given that installing the plugin will make your images at least 25% smaller, why not give it a try now! it is a very simple way to speed up your site. Also pretty cool for geeky visitors to know you are using the latest in imaging technology.
Recently I got notification that a site was temporarily disabled because it had malware on it. Now that the issue is resolved, I believe it to be a false positive and overreaction from the hosting company. It also came on the night that I met a cleanup expert who works for Wordfence, the popular WordPress security plug-in. That meeting came in handy as I noticed scans on some of my sites weren’t completing successfully. My new Wordfence contact helped me find the appropriate settings to allow scans to complete and I wanted to share them with you.
Each of my own sites is hosted at SiteGround and some were recently migrated from other hosting. Even though the SiteGround hosting is far more robust than the previous hosting, I found that Wordfence scans on my sites were hanging up well before the scan was completed.
Let’s first look at the order of a Wordfence scan. Items go from left to right during a scan and the first three are only available for those with the premium version of Wordfence. My scans were hanging up in the middle of the File Changes stage and therefore never got to the Malware Scan. This was very frustrating as it left open the possibility for malware to go undetected.
Many of the things I needed to change were found on the Wordfence | All Options page. Once on that page, scroll down to the Scan Options section. While my sites were not set to do a High Sensitivity scan, it was recommended I not choose this option. All of the available General Options were checked, except for the last three. The boxes not checked are Scan files outside your WordPress installation, Scan images, binary and other files as if they were executable and Enable HIGH SENSITIVITY scanning.
In my own attempts to find a solution, I had tried a much higher Maximum execution time (100) based on a tutorial I’d read. My contact suggested setting this at 15. Probably the biggest thing changed was in the Advanced Scan Options. Each time a scan fails, the file on which it fails is added to the Exclude files list. Mine had grown fairly long and everything on that list was cleared. In it’s place, a few file types were added. While the file types can include malware, none can be executed directly so they are very low risk. The exact entry for those file types is listed below.
*.svg

*.jpg

*.png

*.zip

*.bak
Once these changes were made (and the Save Changes button clicked), the scan ran successfully. Knowing that any problems will be detected quickly helps a Web geek sleep much better at night. Should you have Wordfence scan problems, I hope these suggested changes will help you find a way to get the scan running successfully again.
Receive the latest WordPress, Divi, SEO and design news in your inbox for FREE from Web Design Solutions Unleashed.
We use cookies to ensure that we give you the best experience on our Web site. If you continue to use this site we will assume that you are happy with it.Ok